A Dialog based Application created with Visual C++ is the best and quick way to learn Visual C++. The best part about using MFC (Microsoft Foundation Classes) supplied with Visual C++ is that the basic coding and template design is done by Visual Studio Wizards. In order to create a Dialog Based Application with Visual C++, launch Microsoft Visual Studio and click on New Project as displayed in the screenshot below.
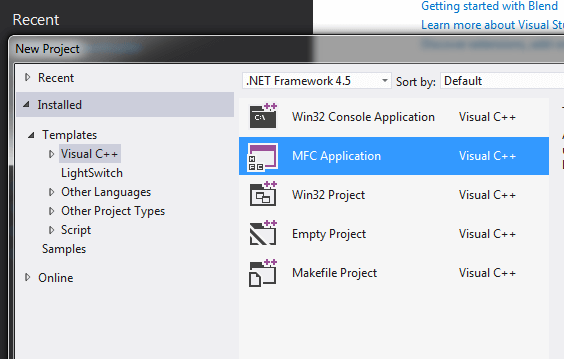
Visual C++ Example to Create MFC Dialog Based Application
This Dialog Based MFC Application does not requires you to write any C++ Code and is just clicking. You will learn various basic steps required to create small or large Visual C++ projects. In this MFC Dialog Example, you will also learn how to locate the Application (.exe) created in Windows Explorer. The New Project Wizard requires you to select a folder location and specify the project name and once you have entered the required parameters, click on OK to continue to the next step of launching the Application Wizard as displayed below.
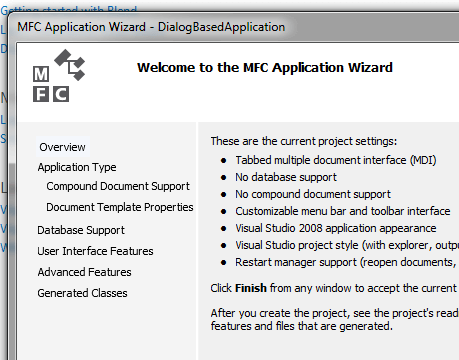
Visual C++ MFC Application Wizard to Create a Dialog Based Application
Note from the above screenshot that you can select multiple parameters like what type of application you wish to create, add database support, customize toolbar, menu bar, add support of Restart manager and much more. Just click on the button labelled Next to step forward in this MFC Application Wizard and select Dialog based MFC Application and Project type to continue.
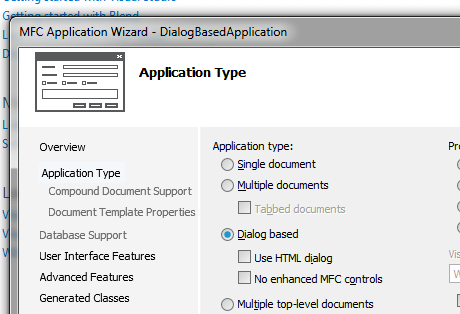
Visual C++ Application Type Configured to Create Dialog Based Application
Once you have selected the option labelled Dialog based as displayed in the above screenshot, click on Finish to let the Application Wizard generate project template code for you. The Application Wizard writes some C++ Code, generates resources (like icon, dialogs, etc) and generates a group of files called Visual C++ Project with which you can create an Application (or .exe) file.
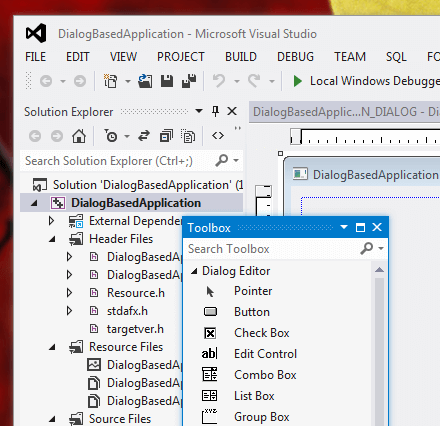
New Dialog Based Application Created with Visual C++
In this MFC Example we are not going to write any code and hence, all you need to do in order to generate an executable file is locate the Build Menu from the Visual Studio Menu bar and click on the Build Menu Item. In case you are comfortable in using keyboard shortcuts, you can even press the Keyboard shortcut F7 to start the build process.
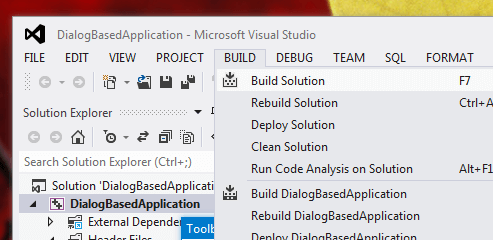
Build Dialog Based Application from Build Menu of Visual Studio
After clicking on the Build Menu Item, various Application will start automatically (like Compiler, Linker, etc) to generate an executable file for you. Once the Build Process is complete, you can locate the application created in this MFC Dialog based Example in Windows Explorer as displayed below.
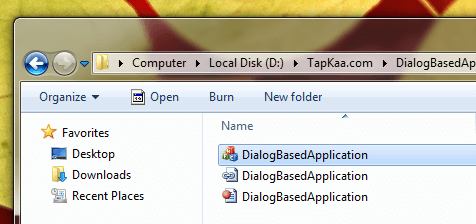
Dialog Based Application Created with Visual C++ in Windows Explorer
In order to distribute the application created in this example, you would need to build a Release Mode Application. By default Visual Studio creates a Debug Mode Application which contains debugging information and is typically useful only for Software Developers. This MFC based Application Example is taught in almost every Visual C++ Course so that students can learn how to use Visual C++ to create applications. Although no C++ coding was done manually in this example, still this Dialog Based Application Example serves a really useful purpose in Visual C++ Training.